

CodeFormer——最强的AI 视频去码、图片修复!
CodeFormer——最强的AI 视频去码、图片修复!
处理效果展示

示例1

示例2
开源项目地址
https://github.com/sczhou/CodeFormer
查看自己显卡是否支持gpu加速
查看gpu是否支持加速:https://developer.nvidia.com/cuda-gpus
参考文章:https://zhuanlan.zhihu.com/p/143881055
如果不支持gpu加速只能cpu硬解,不建议安装。不过我是安装完后运行起来发现cpu跑满,温度达到90度,gpu却没变化,然后才去搜索出现这个问题的原因,结果就是我的独显(gtx1650)不支持加速。给大家先排个雷。还有个「重点:需要科学上网」
CUDA-Enabled GeForce and TITAN Products(部分产品)
「GeForce and TITAN Products」
GPU | Compute Capability |
|---|---|
GeForce RTX 3090 Ti | 8.6 |
GeForce RTX 3090 | 8.6 |
GeForce RTX 3080 Ti | 8.6 |
GeForce RTX 3080 | 8.6 |
GeForce RTX 3070 Ti | 8.6 |
GeForce RTX 3070 | 8.6 |
Geforce RTX 3060 Ti | 8.6 |
Geforce RTX 3060 | 8.6 |
GeForce GTX 1650 Ti | 7.5 |
NVIDIA TITAN RTX | 7.5 |
Geforce RTX 2080 Ti | 7.5 |
Geforce RTX 2080 | 7.5 |
Geforce RTX 2070 | 7.5 |
Geforce RTX 2060 | 7.5 |
NVIDIA TITAN V | 7.0 |
NVIDIA TITAN Xp | 6.1 |
NVIDIA TITAN X | 6.1 |
GeForce GTX 1080 Ti | 6.1 |
GeForce GTX 1080 | 6.1 |
GeForce GTX 1070 Ti | 6.1 |
GeForce GTX 1070 | 6.1 |
GeForce GTX 1060 | 6.1 |
GeForce GTX 1050 | 6.1 |
GeForce GTX TITAN X | 5.2 |
GeForce GTX TITAN Z | 3.5 |
GeForce GTX TITAN Black | 3.5 |
GeForce GTX TITAN | 3.5 |
GeForce GTX 980 Ti | 5.2 |
GeForce GTX 980 | 5.2 |
GeForce GTX 970 | 5.2 |
GeForce GTX 960 | 5.2 |
GeForce GTX 950 | 5.2 |
GeForce GTX 780 Ti | 3.5 |
GeForce GTX 780 | 3.5 |
GeForce GTX 770 | 3.0 |
GeForce GTX 760 | 3.0 |
GeForce GTX 750 Ti | 5.0 |
GeForce GTX 750 | 5.0 |
GeForce GTX 690 | 3.0 |
GeForce GTX 680 | 3.0 |
GeForce GTX 670 | 3.0 |
GeForce GTX 660 Ti | 3.0 |
GeForce GTX 660 | 3.0 |
GeForce GTX 650 Ti BOOST | 3.0 |
GeForce GTX 650 Ti | 3.0 |
GeForce GTX 650 | 3.0 |
GeForce GTX 560 Ti | 2.1 |
GeForce GTX 550 Ti | 2.1 |
GeForce GTX 460 | 2.1 |
GeForce GTS 450 | 2.1 |
GeForce GTS 450* | 2.1 |
GeForce GTX 590 | 2.0 |
GeForce GTX 580 | 2.0 |
GeForce GTX 570 | 2.0 |
GeForce GTX 480 | 2.0 |
GeForce GTX 470 | 2.0 |
GeForce GTX 465 | 2.0 |
GeForce GT 740 | 3.0 |
GeForce GT 730 | 3.5 |
GeForce GT 730 DDR3,128bit | 2.1 |
GeForce GT 720 | 3.5 |
GeForce GT 705* | 3.5 |
GeForce GT 640 (GDDR5) | 3.5 |
GeForce GT 640 (GDDR3) | 2.1 |
GeForce GT 630 | 2.1 |
GeForce GT 620 | 2.1 |
GeForce GT 610 | 2.1 |
GeForce GT 520 | 2.1 |
GeForce GT 440 | 2.1 |
GeForce GT 440* | 2.1 |
GeForce GT 430 | 2.1 |
GeForce GT 430* | 2.1 |
GPU | Compute Capability |
|---|---|
GeForce RTX 3080 Ti | 8.6 |
GeForce RTX 3080 | 8.6 |
GeForce RTX 3070 Ti | 8.6 |
GeForce RTX 3070 | 8.6 |
GeForce RTX 3060 | 8.6 |
GeForce RTX 3050 Ti | 8.6 |
GeForce RTX 3050 | 8.6 |
Geforce RTX 2080 | 7.5 |
Geforce RTX 2070 | 7.5 |
Geforce RTX 2060 | 7.5 |
GeForce GTX 1080 | 6.1 |
GeForce GTX 1070 | 6.1 |
GeForce GTX 1060 | 6.1 |
GeForce GTX 980 | 5.2 |
GeForce GTX 980M | 5.2 |
GeForce GTX 970M | 5.2 |
GeForce GTX 965M | 5.2 |
GeForce GTX 960M | 5.0 |
GeForce GTX 950M | 5.0 |
GeForce 940M | 5.0 |
GeForce 930M | 5.0 |
GeForce 920M | 3.5 |
GeForce 910M | 5.2 |
GeForce GTX 880M | 3.0 |
GeForce GTX 870M | 3.0 |
GeForce GTX 860M | 3.0/5.0(**) |
GeForce GTX 850M | 5.0 |
GeForce 840M | 5.0 |
GeForce 830M | 5.0 |
GeForce 820M | 2.1 |
GeForce 800M | 2.1 |
GeForce GTX 780M | 3.0 |
GeForce GTX 770M | 3.0 |
GeForce GTX 765M | 3.0 |
GeForce GTX 760M | 3.0 |
GeForce GTX 680MX | 3.0 |
GeForce GTX 680M | 3.0 |
GeForce GTX 675MX | 3.0 |
GeForce GTX 675M | 2.1 |
GeForce GTX 670MX | 3.0 |
GeForce GTX 670M | 2.1 |
GeForce GTX 660M | 3.0 |
GeForce GT 755M | 3.0 |
GeForce GT 750M | 3.0 |
GeForce GT 650M | 3.0 |
GeForce GT 745M | 3.0 |
GeForce GT 645M | 3.0 |
GeForce GT 740M | 3.0 |
GeForce GT 730M | 3.0 |
GeForce GT 640M | 3.0 |
GeForce GT 640M LE | 3.0 |
GeForce GT 735M | 3.0 |
GeForce GT 635M | 2.1 |
GeForce GT 730M | 3.0 |
GeForce GT 630M | 2.1 |
GeForce GT 625M | 2.1 |
GeForce GT 720M | 2.1 |
GeForce GT 620M | 2.1 |
GeForce 710M | 2.1 |
GeForce 705M | 2.1 |
GeForce 610M | 2.1 |
GeForce GTX 580M | 2.1 |
GeForce GTX 570M | 2.1 |
GeForce GTX 560M | 2.1 |
GeForce GT 555M | 2.1 |
GeForce GT 550M | 2.1 |
GeForce GT 540M | 2.1 |
GeForce GT 525M | 2.1 |
GeForce GT 520MX | 2.1 |
GeForce GT 520M | 2.1 |
GeForce GTX 485M | 2.1 |
GeForce GTX 470M | 2.1 |
GeForce GTX 460M | 2.1 |
GeForce GT 445M | 2.1 |
GeForce GT 435M | 2.1 |
GeForce GT 420M | 2.1 |
GeForce GT 415M | 2.1 |
GeForce GTX 480M | 2.0 |
GeForce 710M | 2.1 |
GeForce 410M | 2.1 |
安装环境准备
python。官网下载地址:https://www.python.org/downloads/
git。官网下载地址:https://git-scm.com/
conda。官网下载地址:https://www.anaconda.com/products/distribution
Pytorch >= 1.7.1。官网地址:https://pytorch.org/
CUDA >= 10.1。英伟达独立显卡,cuda引擎大于10.1。否则只能通过cpu解码(CPU解码性能弱于GPU)
安装python、git、conda
「安装python注意点:」
「pyghon一定不能最新版,不要高于3.10.9版本」,教程使用3.10.9成功安装。
运行.exe程序后,一定勾选add .exe to path。把python添加到环境变量,如果不勾选,安装后就需要资源配置环境变量。
python安装成功后,cmd命令行输入python --version会显示版本信息。
「安装conda注意点:」
安装好后需要自己配置环境变量。或者在安装过程勾选加入环境变量,不过我发现勾选后会红字提示可能出问题,所以没有勾选。网上有直接勾选的可以试试。成功后,在cmd输入conda --version会显示版本信息。
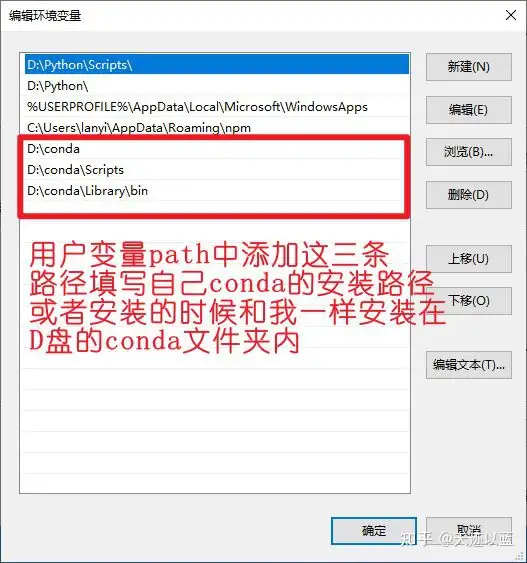
配置conda环境变量
成功配置示例
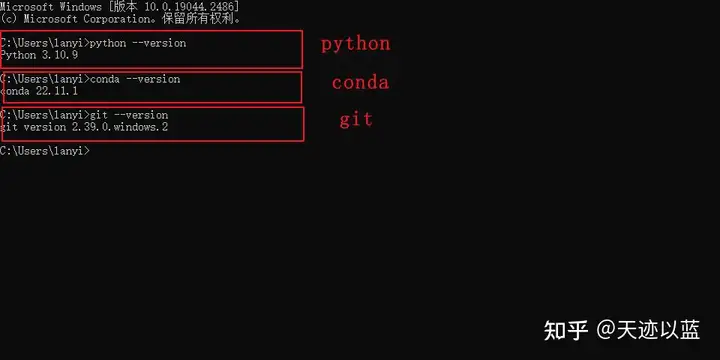
环境配置成功示例
Pytorch环境安装
conda install pytorch torchvision torchaudio pytorch-cuda=11.7 -c pytorch -c nvidia
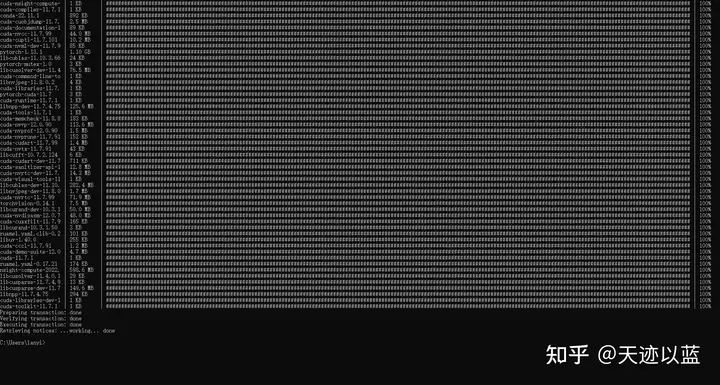
成功安装页面
安装其它需求包
逐条执行下列代码
git clone https://github.com/sczhou/CodeFormer
cd CodeFormer
pip install -r requirements.txt -q
pip install -q gradio
python basicsr/setup.py develop
pip install -r requirements.txt -q命令中requirements的内容
addict
future
lmdb
numpy
opencv-python
Pillow
pyyaml
requests
scikit-image
scipy
tb-nightly
torch>=1.7.1
torchvision
tqdm
yapf
lpips
gdown # supports downloading the large file from Google Drive
ffmpeg-python
意思就是要pip命令安装以上这些包
pip安装出错过程
我一开始下载的python是最新版,出现了下面的错误。换了版本后重新执行pip install -r requirements.txt -q,没有出现爆红错误。

安装pyghon版本过高出现的错误
排完python版本的雷,又出现安装future出错,按照提示在命令后面加--use-pep517再重执行新pip安装。
解决方法:
pip install future --use-pep517

pip安装出错
最后再执行pip install -r requirements.txt -q,没有出错
python basicsr/setup.py develop命令下载训练模型
命令行下载
python scripts/download_pretrained_models.py facelib  #facelib训练
python scripts/download_pretrained_models.py CodeFormer  #CodeFormer预训练
手动下载
解压facelib.zip中的文件放到weights/facelib文件夹内,下载:https://www.123pan.com/s/t9brVv-ls4ph 提取码:aixf
解压codeformer.zip中的文件放到weights/CodeFormer文件夹内.下载:https://www.123pan.com/s/t9brVv-7s4ph 提取码:aixf
使用方法
面部修复
# For cropped and aligned faces
python inference_codeformer.py -w 0.5 --has_aligned --input_path [input folder]
整体图像增强
# For whole image
# Add '--bg_upsampler realesrgan' to enhance the background regions with Real-ESRGAN
# Add '--face_upsample' to further upsample restorated face with Real-ESRGAN
python inference_codeformer.py -w 0.7 --input_path [image folder/image path]
视频增强
# For video clips
python inference_codeformer.py --bg_upsampler realesrgan --face_upsample -w 1.0 --input_path [video path]
注意:
#开头的是注释内容,命令都是python开头的行。
每次使用前都要先进入cmd,执行cd CodeFormer,进入安装目录后再执行对应命令。
执行python开头的命令时,把[input folder]整体替换成待处理的图片所在的文件夹路径。整体图像和视频增强同理,都是把[]替换成路径。
结果在result里面
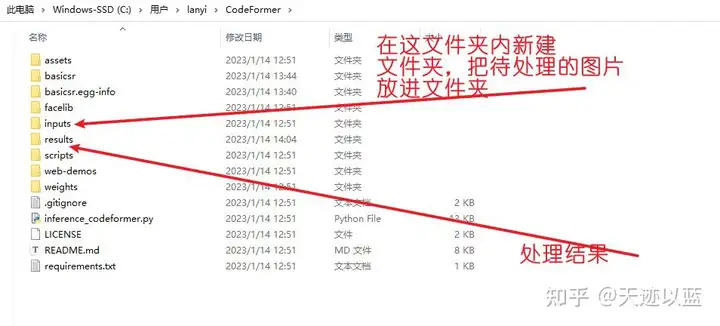
目录路径
总结
没有gpu加速的建议不要使用,太耗cpu了
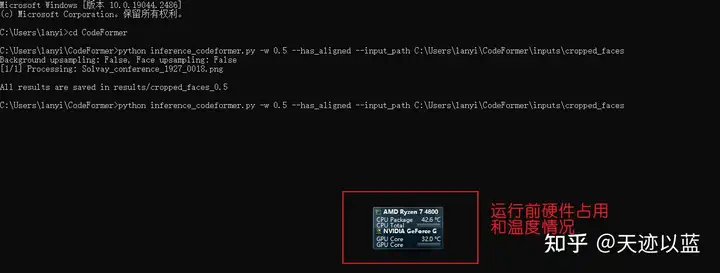
运行前硬件情况
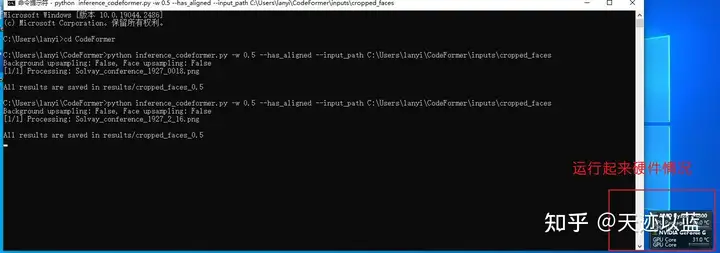
运行后硬件情况
只是处理一张图,运行起来后cpu温度达到96,gpu几乎没动。所以没有gpu加速的不建议使用